Your progress:
What will you learn in this lesson?
After completing this lesson, you’ll be able to:
- Explain how to use the Whiteboard.
Let’s set the scene.
 |
Layne is keen to find the most efficient way for her team to manage the Actions assigned to them on a Project. |
What is the Whiteboard?
Would you like to view all of your Actions as ‘sticky notes’ on a virtual whiteboard? Does your team use Kanban boards in real life and want to go virtual? You’re in luck! Let’s take a look at the Mission Control Whiteboard. There are three main areas as follows:

(1) Control panel – settings that let you manage what is displayed on the Whiteboard and filter the list of Action Owners.
(2) Whiteboard – the place where the ‘sticky notes’ or ‘cards’ are displayed.
(3) Action ‘card’ – an individual ‘sticky note’ or ‘card’ representing an Action that needs to be completed.
Control panel – settings
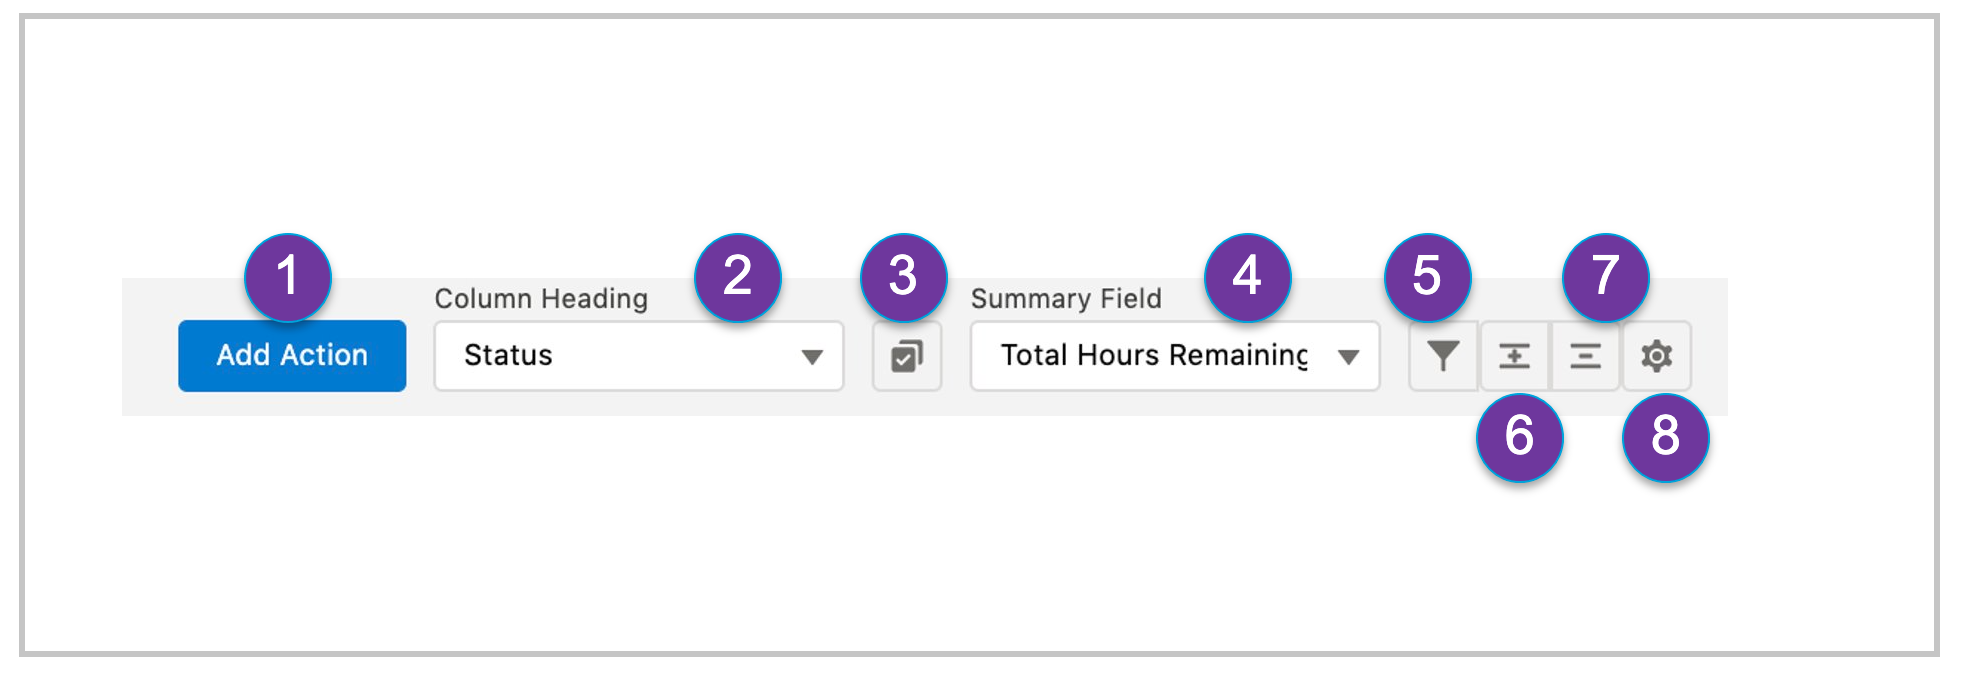
(1) Add Action – ability to create a new Action record
(2) Column headings– dynamically adjust which columns appear and use a drag and drop motion to move the card from one to the other, for example, group cards by Status as per the above diagram.
(3) Heading filters – filter by action status
(4) Summary field – by default, this will be set to Total Hours Remaining, however, you have the option to change this to a range of other Number or Percent fields on the Action.
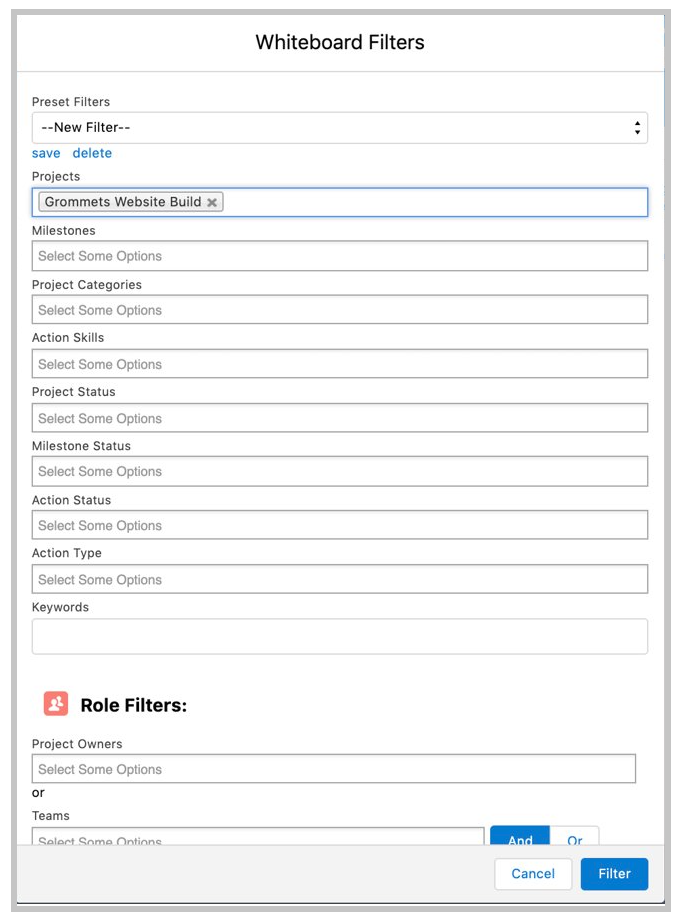
(5) Filter icon – ability to filter the Whiteboard based on the options below.
(6) Expand all actions – see the details of all actions.
(7) Collapse all actions – see a summary of all actions.
(8) Settings icon – ability to select which fields are displayed on each action card (‘sticky note’). You can control the Sort Order of cards. You can also choose 5 fields to sort by, and the direction (ascending or descending).

Control panel – Role filter
The right side of the Whiteboard displays a list of Roles. When reassigning the Actions, you can simply drag and drop the Role photo onto the photo on an Action card and it will reassign the Action.

To filter the list of Roles displayed on the right of the Whiteboard, click the filter icon and the following options appear.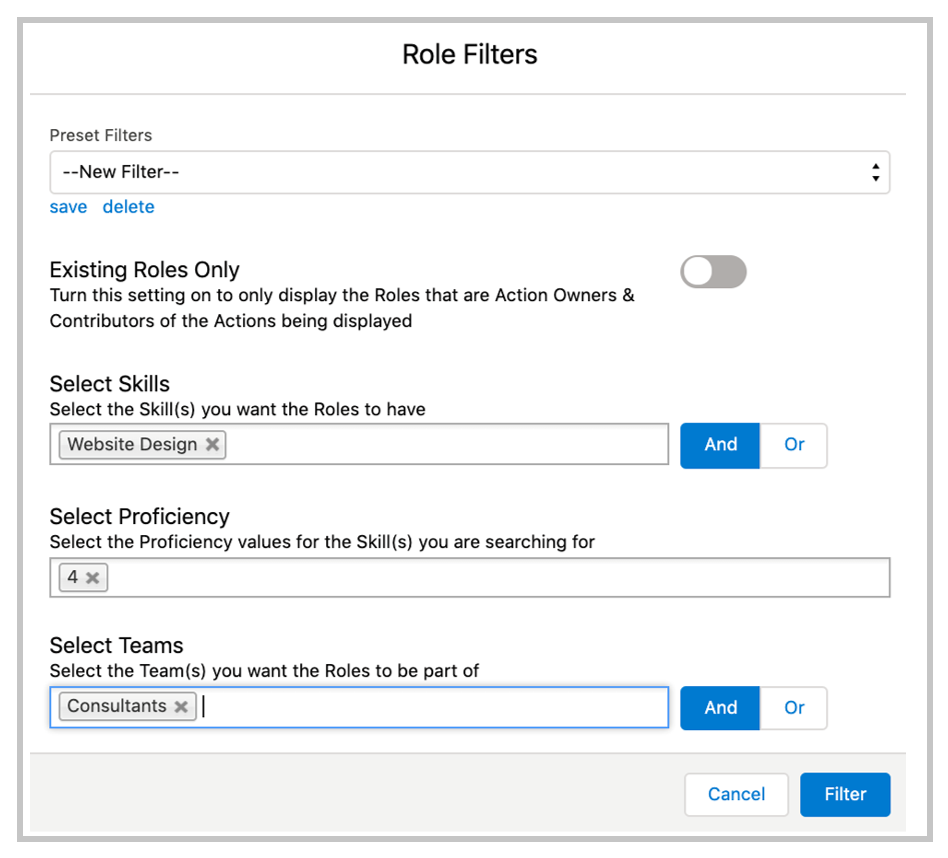
Whiteboard
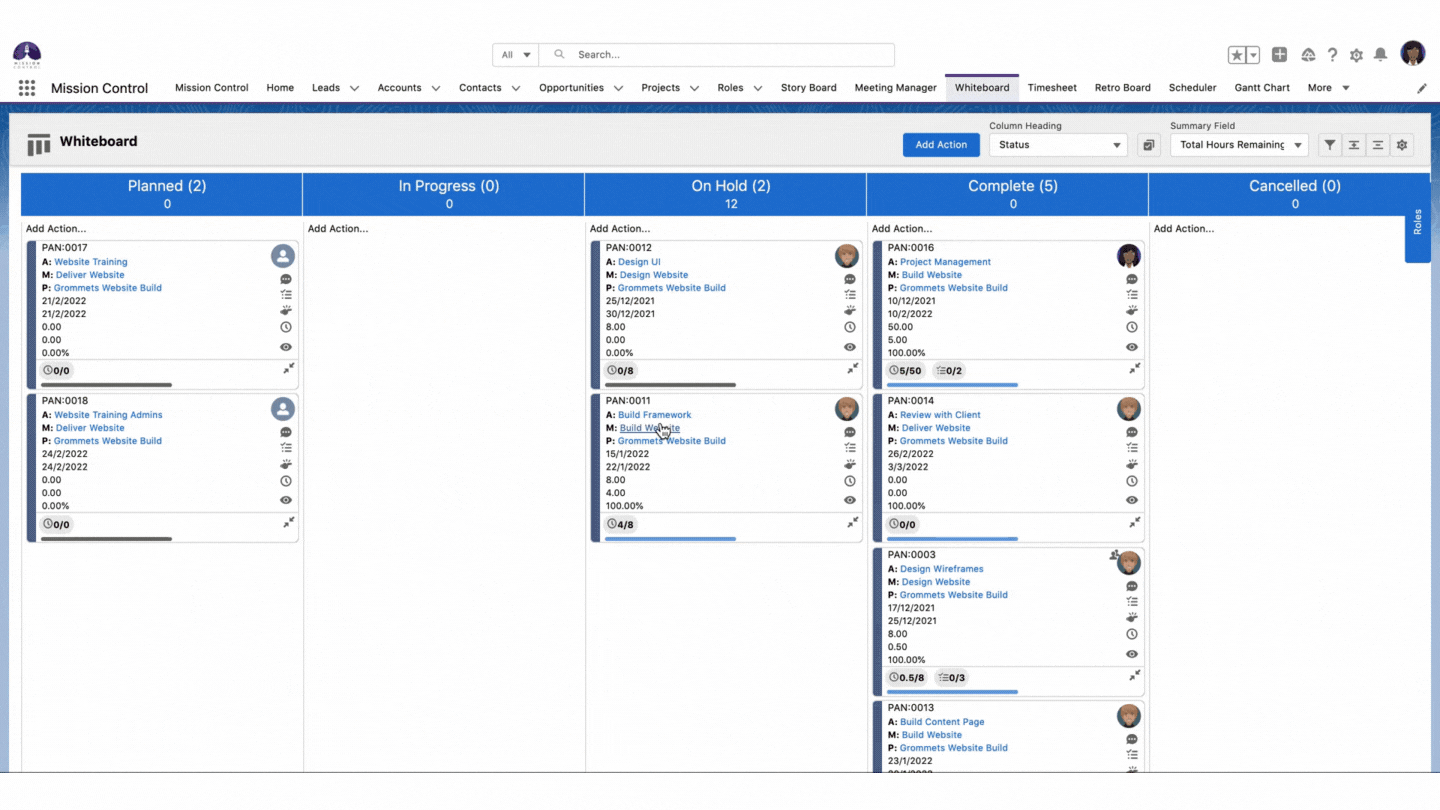
You can drag and drop an Action card from one column to another to update the Status, or by whichever field they have been grouped.
Action ‘card’
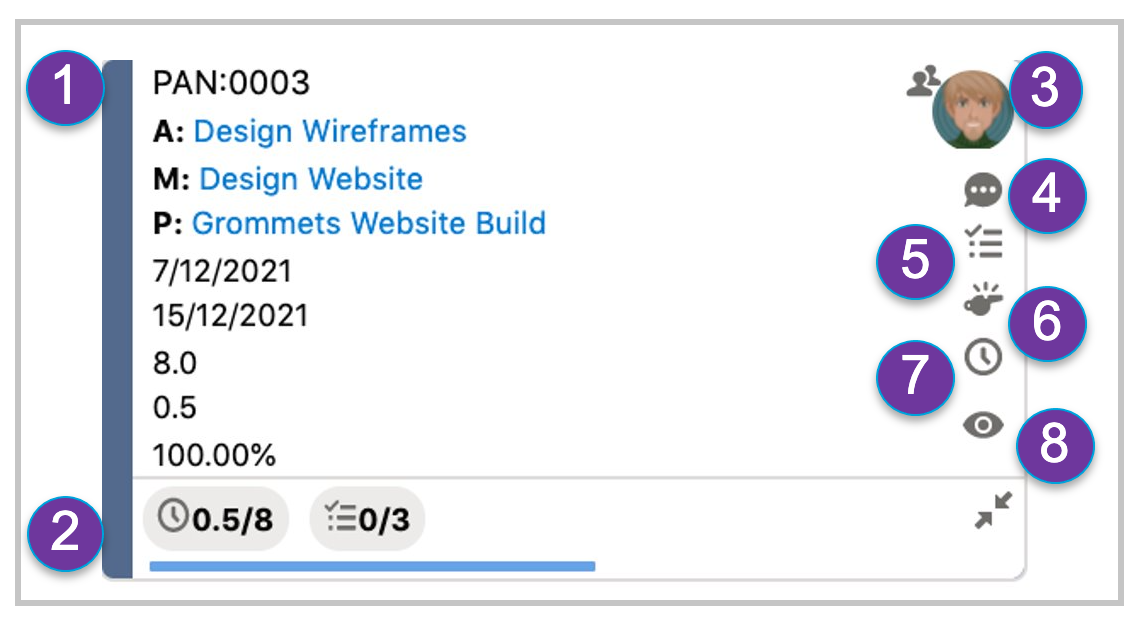
(1) Action details – static details that always appear on the card:
- Action ID – also shows the warning icon if nearing due date.
- Action Name – click the link to open Action record.
- Milestone Name – click the link to open Milestone record.
- Project Name – click the link to open Project record.
(2) Action details – customizable details that are configured in the Whiteboard settings. Start Date, End Date, Total Hours Scheduled, Total Hours Completed and Completion Percentage will be displayed as the default.
(3) Action owner – Role the action is assigned to, plus also shows a grey people icon if the Action has Contributors (as per above example).
(4) Action Chatter feed – view the Action Chatter Feed and Post a new comment.
(5) Action Checklist – view items, edit items, delete items, mark items as complete and add new items to the list.
(6) Issues Manager – identify and log issues.
(7) Log Time – log time or start ‘tracking’ time.
(8) Action Summary – view and edit Action record.
Note: Colour on the left side of the card is the color as defined on the Project Detail page.
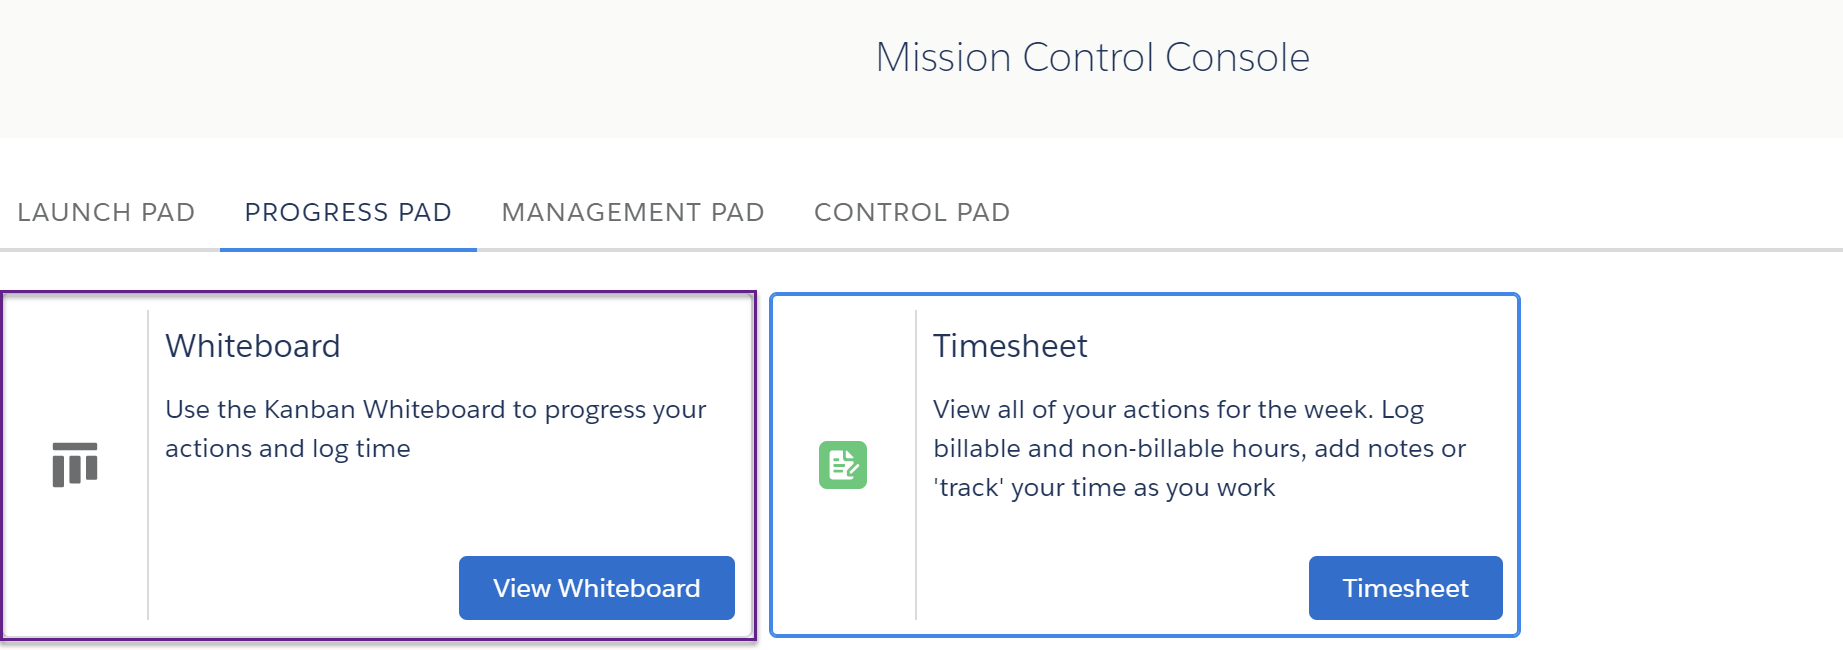
How do I access the Whiteboard?
You are able to access the Whiteboard in a couple of ways. These include:
- Whiteboard tab
- Progress Pad on the Mission Control Console
Before we move on…
Layne is excited to show her team how to use the Whiteboard to manage their Actions.
Ready to move on? Take the quiz below to test your knowledge.
