Your progress:
What will you learn in this lesson?
After completing this lesson you’ll be able to:
- Explain how to create and submit expenses.
Let’s set the scene.
 |
Kelly has taken a taxi to and from the client’s office to showcase the initial website design and needs to be reimbursed for the expense. |
How do I capture expenses?
Mission Control allows a team member to create and submit the details of an expense that has been incurred. An expense may be Project-related, in which case it would be linked to the Project on which it was incurred, or it may be independent of a Project, for example, an internal expense.
Expense details include:
- Incurred by a Role
- Either an amount (currency) OR distance if claiming mileage
- A Non Billable flag to exclude the expense from client invoicing
- A Category, such as Accommodation or Travel
- Supporting documentation, such as receipts
- An approval status
Note: if distance has been used, Amount Claimed = distance x mileage rate. Mileage rate is found on the Role of the Incurred by.
Does an expense need to be approved?
Yes, it does! Only once an Expense has been approved will the amount be attributed to the Project. By default, an Expense record will have an approval status of ‘Pending’. Once the expense is ready for review, the status can be updated to ‘Submitted’.
There are two ways an expense can be approved – either by the Role Manager or the Project Owner.
Let’s create and submit expenses.
We are going to look at three different options.
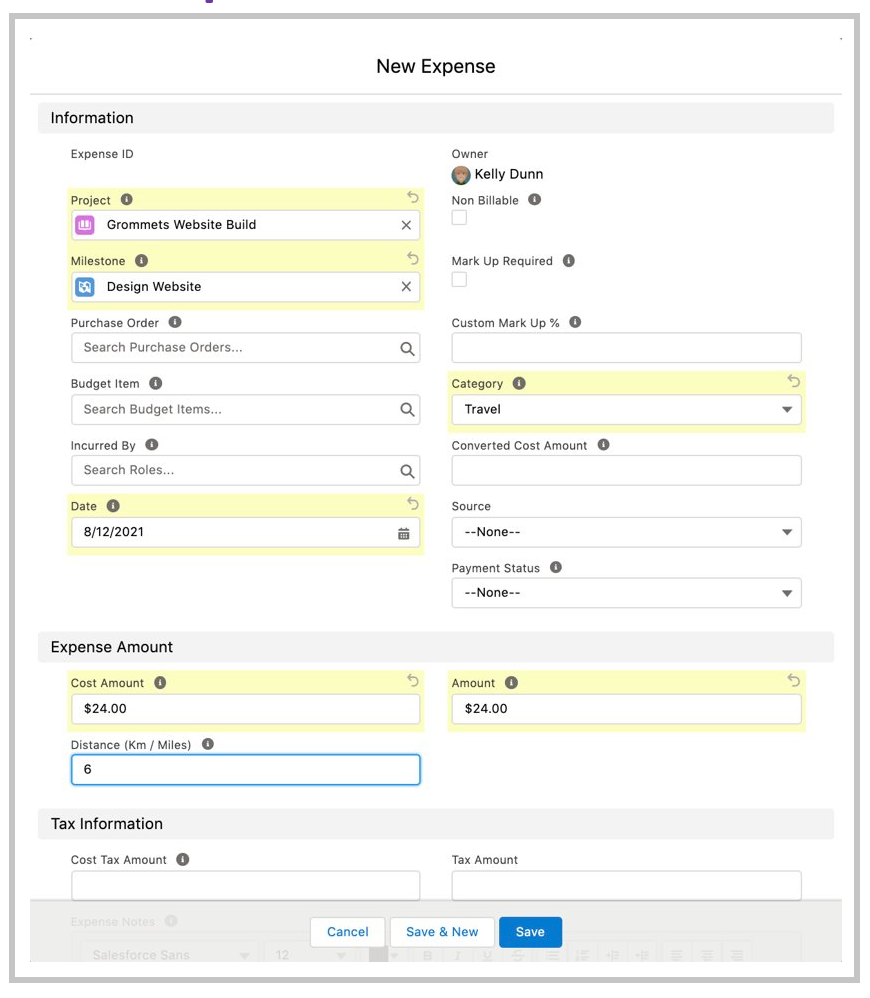
a) A project-related expense
has taken a taxi to the client’s office to discuss the website project and needs to be reimbursed. Here are the steps:
- Navigate to Project.
- Click Overview.
- Click Expenses.
- Click New.
- Populate details, including Amount OR Distance.
- Set Approval Status. If ready to be submitted it will be “Submitted”.
- Click Save.
- From the Expense record, click Related.
- Click Upload Files from the Notes & Attachments related list to provide any supporting documentation.
b) An internal expense
Kelly has purchased a new toner cartridge for the laser printer in the Aprika office. The expense is not related to a Project. Here are the steps:
- Navigate to Expenses tab.
- Click New.
- Populate details, including Amount OR Distance.
- Set Approval Status. If ready to be submitted it will be “Submitted”.
- Click Save.
- From the Expense record, click Related.
- Click Upload Files from the Notes & Attachments related list to provide any supporting documentation.

You can have the Project Owner and Role Manager approve expenses. When selecting who needs to approve expenses, you can select one of the following four options:
- Role Manager: the team member entering the expense will require approval from their Role Manager
- Project Owner: the team member entering the expense will require approval from the Project Owner
- Role Manager and Project Owner: the team member entering the expense will require approval from both their Role Manager and the Project Owner
- No Approval Required: the expense entered will be automatically set to Approved
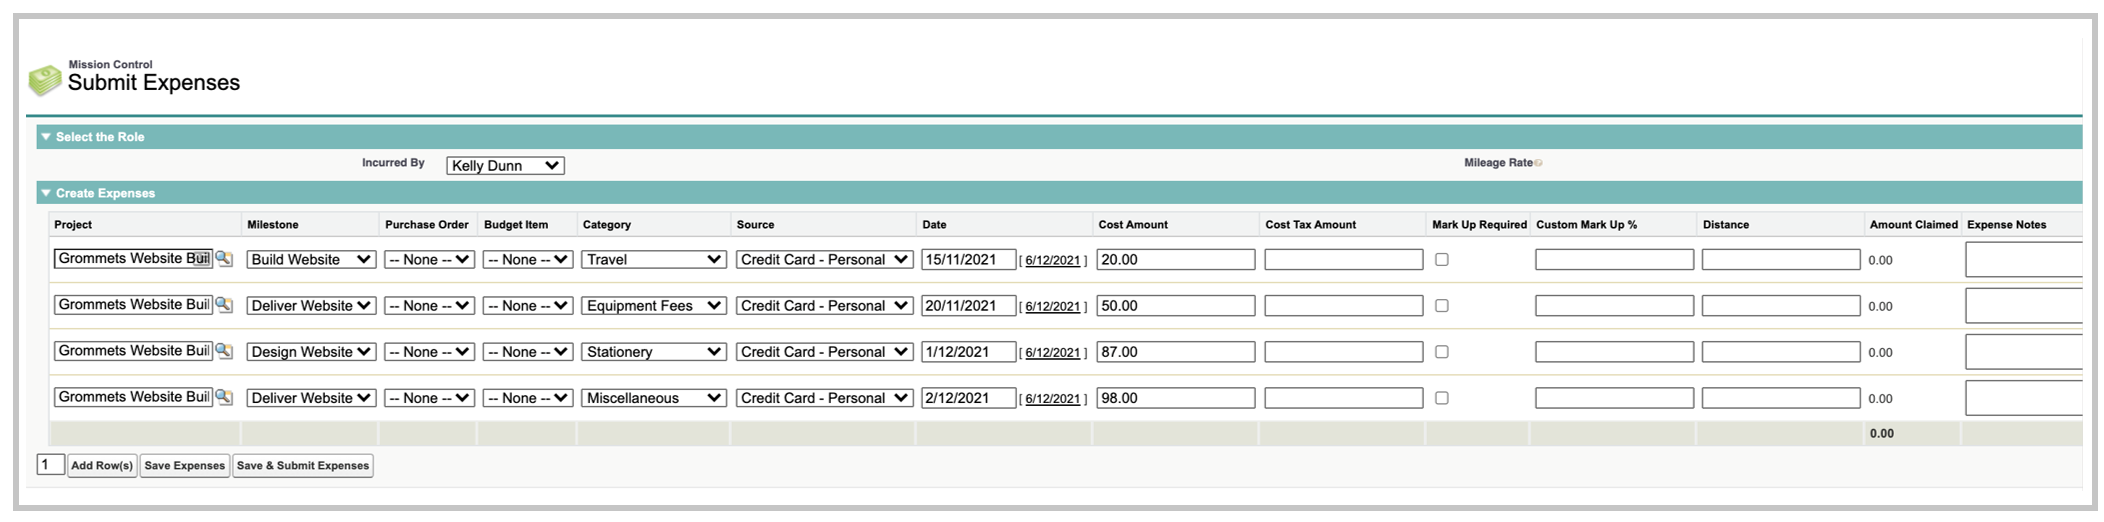
c) A group of expenses
Kelly has fallen a little bit behind with his expense logging. He needs to submit quite a few expenses, across different Projects. Here are the steps to add multiple expenses on a single page:
- Click the Mission Control Tab.
- Click Progress Pad.
- From the Log Expenses tile, click Log Expenses.
- Select the required Role from the Incurred By picklist.
- Click Add Row(s) as many times as needed to create a row for each expense to be submitted.
- For each row, populate the details, including Amount OR Distance.
- Set Approval Status. If ready to be submitted it will be “Submitted”.
- Click Create Expenses when done.
Note: Expenses can also be logged via the Track Pad, or via the Salesforce Mobile App. Both of these methods also support the uploading of receipts.
A final word on submitting expenses.
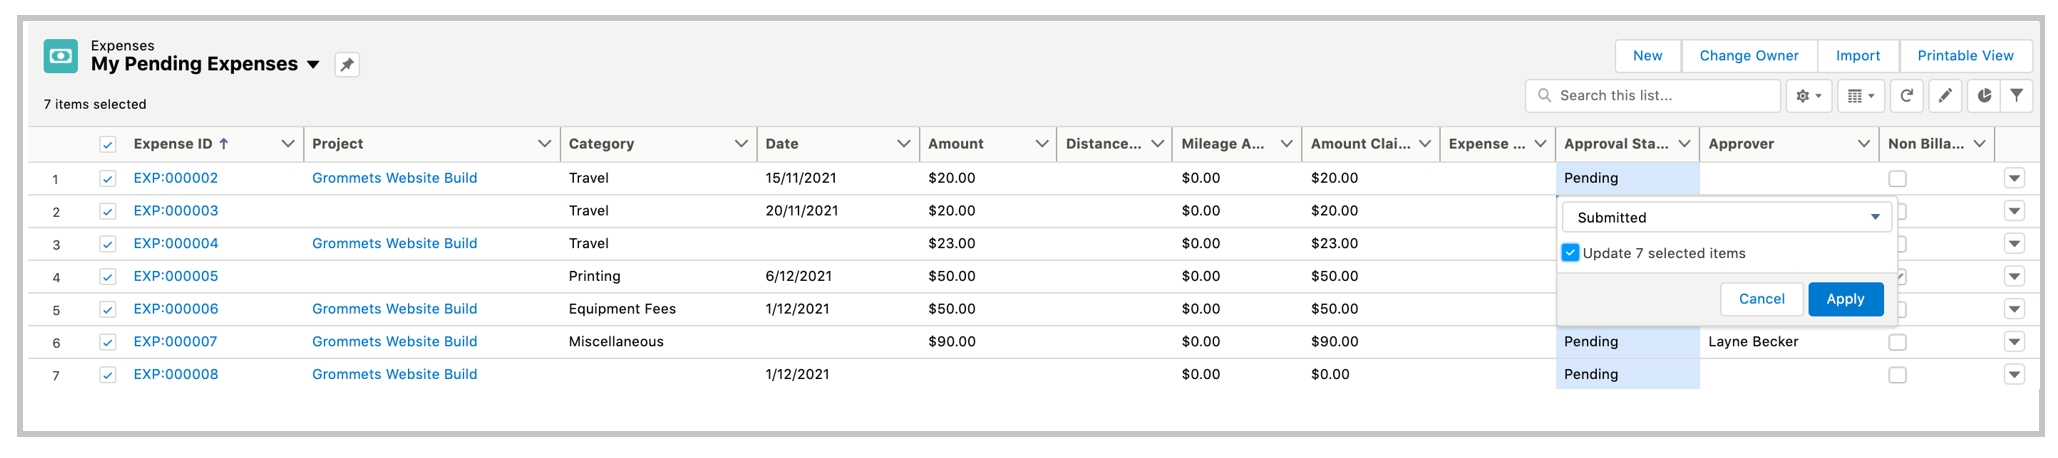
What if you have been submitting expenses as you go for a project, but have a process where your team waits until the end of the project to submit them all at once? Not a problem. It’s easy to submit a group of expenses that are currently sitting on “Pending”. Here are the steps:
- Click on the Expenses tab.
- Open the ‘My Pending Expenses’ list view.
- Check the box to the left of each Expense to be submitted or modified.
- Double-click on the Approval Status for one of the selected rows.
- Change the status to ‘Submitted’.
- Check the box to ‘Update X selected items’ where X represents the number of expenses to be updated.
- Click Apply.
Before we move on…
Kelly has just created an Expense record that requires approval by Layne.
Ready to move on? Take the quiz below to test your knowledge.
